Account Portal
Getting Started with AutomatR Accounts portal
Logging in AutomatR Accounts web portal
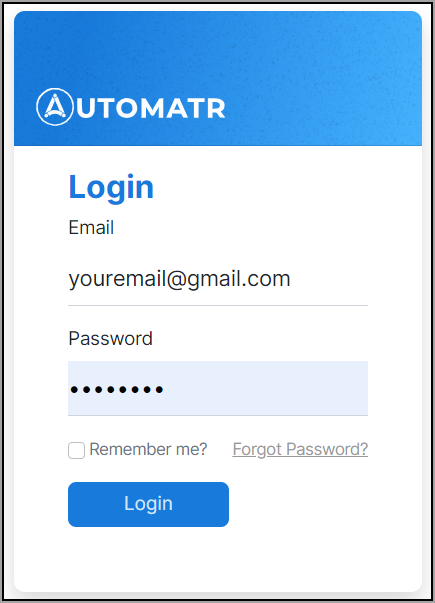
To start AutomatR, first log in to the web-based AutomatR Accounts web portal application:
Open the AutomatR portal in your browser.
Enter the Email, Password and click Login.

After you have successfully logged in, you will be directed to the AutomatR portal home page.
Starting the AutomatR module
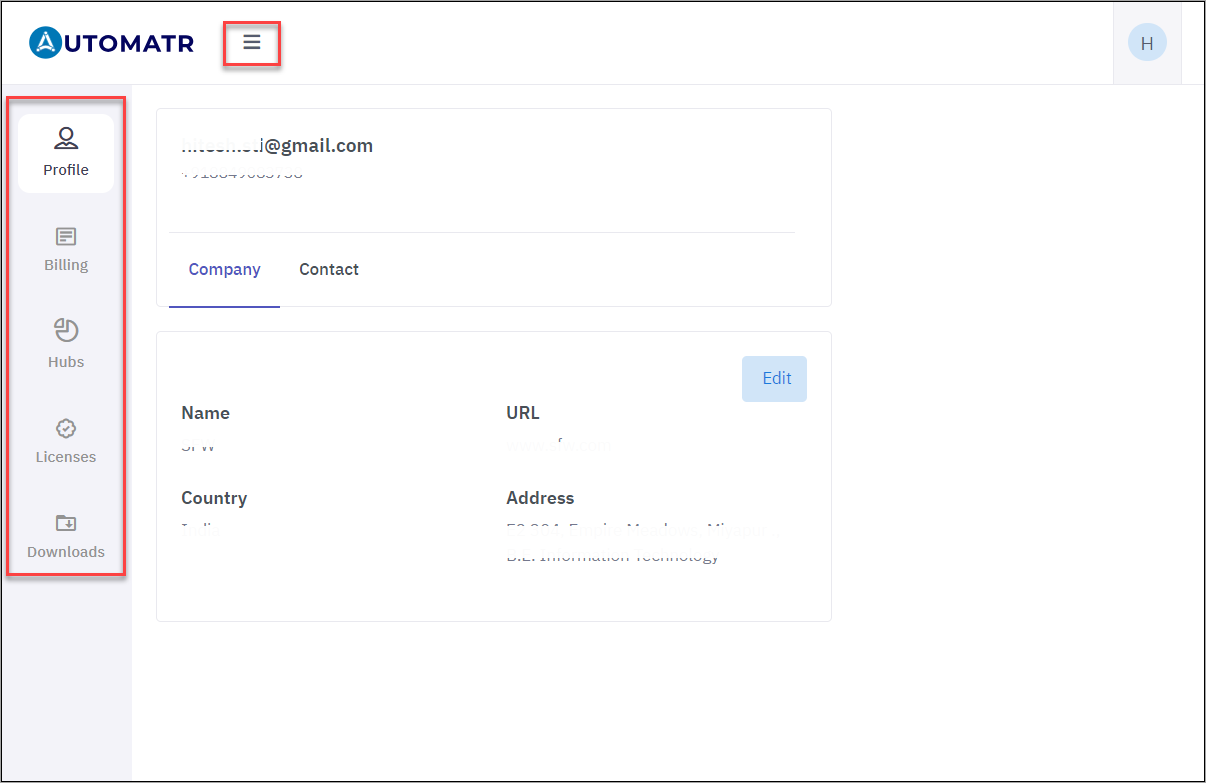
To start the AutomatR module, from the AutomatR Accounts web portal home page, click on the Menu icon to view the side bar:

Tabs
Different functionalities of the AutomatR moules are organised into tabs. These include: Profile, Billing, Hubs, Licenses and Downloads.
Overview of Profile tab
The Profile tab in the AutomatR application serves as a centralized hub where users can manage and update their Company and Contact information. It offers users the ability to maintain their account details and provides a snapshot of their identity within the platform. The AutomatR Profile tab typically includes the following fields:
Email: The user's registered email address, which is essential for account identification, communication, and account recovery purposes.
Phone Number: The user's contact number, allowing the platform to reach out to them for important updates or notifications.
Company details:
a. Name: The name of the company, enabling a personalized experience within the application and facilitating communication between users.
b. URL: If the user represents a company or organization, they can provide their company's website URL for better networking and visibility.
c. Country: The user's country of residence or business location, which aids in tailoring certain aspects of the platform to regional preferences or regulations.
d. Address: This field allows users, particularly businesses, to enter their physical address, providing additional contact information and fostering credibility.
Contact details:
a. Name: The user's full name, enabling a personalized experience within the application and facilitating communication between users.
b. Email: The user's registered email address, which is essential for account identification, communication, and account recovery purposes.
c. Phone Number: The user's contact number, allowing the platform to reach out to them for important updates or notifications.
Users can access the Profile tab through the application and they can easily update their information as needed, ensuring that their details remain accurate and up-to-date.
By providing users with control over their profile information, the Profile tab promotes a personalized and user-centric experience within the application. This not only enhances the overall usability of the platform but also helps to build trust and engagement among the users. Additionally, maintaining accurate user data through the Profile tab contributes to effective communication and streamlines interactions between users and the platform, ultimately fostering a more seamless and efficient user experience.
Overview of Billing tab
The Billing tab in the AutomatR portal serves as a central hub for managing and handling all aspects related to the user's billing and payment information. It provides a convenient and secure space for users to access and modify their financial details. The Billing tab typically includes the following fields:
Name: The user's full name, ensuring accuracy in billing information and providing a connection between the account holder and their financial details.
Email: The user's registered email address, which serves as a primary identifier for their billing account and communications regarding payment-related matters.
Phone Number: The user's contact number, which can be used for verification purposes or to provide important billing updates via SMS or phone calls.
Address: This field captures the user's billing address, ensuring that invoices, receipts, and other billing-related documents are sent to the correct physical location (if required).
Within the Billing tab, users can edit their details and update or save them for payment-related activities. The Billing tab ensures that users have a clear understanding of their financial obligations within the application and enables them to manage their payments efficiently.
Overview of Hubs tab
Hubs tab refer to the main user interface components that represent different environments within the AutomatR platform. Each Hub serves as a distinct workspace, allowing users to organize, manage, and switch between different sets of automations and resources.
By adding a Hub Name and selecting the appropriate Hub Type during the setup process, users can effectively organize and manage their network infrastructure or computing resources. The Hub Name aids in easy identification and administration, while the choice of Hub Type determines the deployment model and location, shaping factors like control, cost, and accessibility to align with the organization's requirements and preferences.
Adding a Hub Name and Hub Type:
When setting up a hub within a network infrastructure or computing environment, the process typically involves providing a unique Hub Name and specifying the Hub Type, which can be either On-Premises or Cloud.
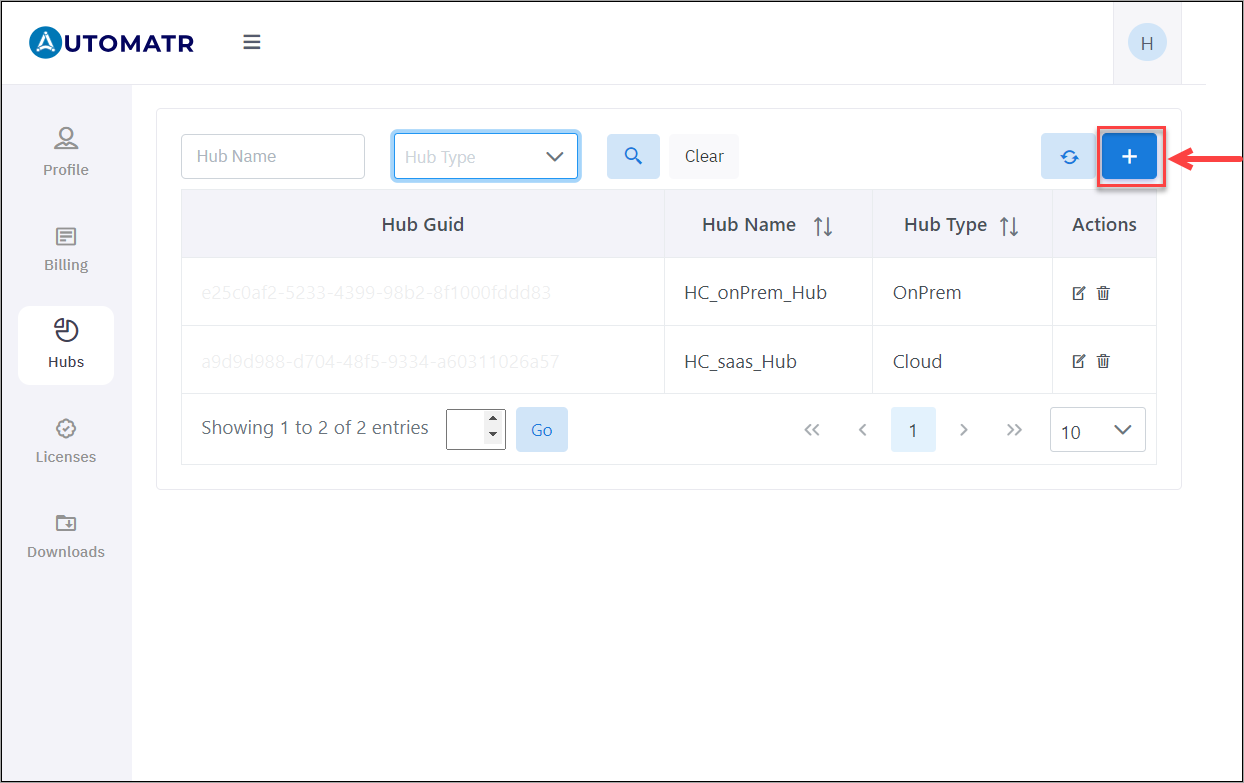
To add a Hub, click on the + icon towards the top-right corner:

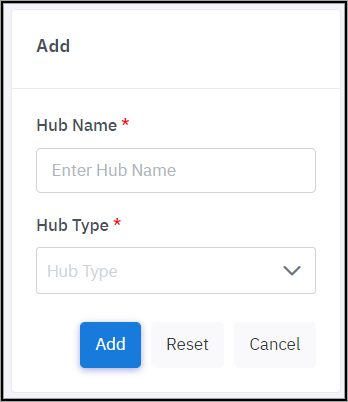
Enter the Hub Name, select the Hub Type from the drop-down list and click Add:

| Field | Description | ||||||
|---|---|---|---|---|---|---|---|
| Hub Name | It is a user-defined identifier that distinguishes the hub from other network components or computing entities. It serves as a human-readable label for easy recognition and management of the hub. Users can choose a descriptive and meaningful name that aligns with the purpose or location of the hub within their organization. | ||||||
| Hub Type | You can choose between On-Premises and Cloud Hubs based on factors such as security requirements, cost considerations, scalability needs, and the nature of their applications. In many cases, hybrid solutions that combine elements of both On-Premises and Cloud environments are also adopted to leverage the benefits of each approach. The Hub Types in AutomatR refers to the deployment model or location of the hub. It offers two main types of Hubs:
|
Both Cloud and OnPrem Hubs are integral parts of the AutomatR Automation Platform, empowering organizations to maximize their automation potential and drive digital transformation initiatives. By offering dedicated environments for different automation-related activities, AutomatR Hubs enhance collaboration, streamline automation workflows, and facilitate data-driven decision-making for more successful automation implementations.
Overview of Licenses tab
The Licenses tab provides you with all the essential information regarding your licenses, including license keys, associated products, start date, end date, and hub name.
License Keys: A list of all the license keys associated with your account. Each license key is a unique identifier that grants you access to specific products within AutomatR.
Product Information: You can find details about the products covered by each license key. These products may include various features, functionalities, or services offered by AutomatR.
Start and End Dates: The license start date signifies the beginning of the validity period for each license key. Similarly, the end date indicates when the license will expire. It's crucial to keep track of these dates to ensure uninterrupted access to AutomatR.
Hub Name: The hub name refers to the central location or platform where your licenses are managed. It helps you organize and differentiate licenses associated with different projects, teams, or clients. In case you have multiple hubs, the "Hub Name" field will help you identify which licenses belong to which hub. You can manage and switch between hubs to organize your licenses more efficiently.
NOTE: It's essential to keep your license keys safe and confidential. Sharing or distributing license keys without proper authorization may violate the terms of use and lead to license revocation.
For more information about a specific license or if you have any questions or need assistance regarding the Licenses section or any other part of AutomatR application, please don't hesitate to reach out to our support team at support@automatr.tech. We hope you enjoy using our application with your licensed products!
Overview of Downloads tab
The Download sections lists all the latest setup files for various products of AutomatR. You can access the latest setup files for these seven essential products of AutomatR: Cloud Studio, Unattended, Studio, Hub, Attended, Cloud Bot and Cloud Unattended. Each product serves a unique purpose, catering to your specific needs and provide improved functionality. We highly recommend downloading the latest version to make the most out of the AutomatR application. Only the procured license products are listed under the downloads section.
| AutomatR Products | Description |
|---|---|
| Cloud Studio | Download the latest setup files for the Cloud Studio and experience the power of web-based automation development, allowing you to build and manage automation projects directly from your browser. Collaborate with team members in real-time, access your projects from anywhere, and enjoy seamless scalability with Cloud Studio. |
| Unattended | Download the latest setup files for the Unattended automation solution. Unattended robots are designed to execute automation tasks in the background, without requiring any human intervention. You can boost productivity and efficiency by automating repetitive and rule-based processes. |
| Studio | The Studio section contains the latest setup files for the desktop application. This powerful tool allows you to build, develop, and deploy automation projects on your local machine. Whether you are a seasoned developer or just starting, Studio provides an intuitive interface for designing automation workflows. |
| Hub | The Hub section offers the latest setup files for the Automation Hub platform. Automation Hub allows you to collaborate, manage, and govern automation initiatives across your organization effectively. Centralize your automation efforts and ensure consistent practices. |
| Attended | Download the latest setup files for the Attended automation solution. Attended robots work alongside human operators, assisting them in their tasks and improving overall productivity. With Attended automation, you can automate tasks that require human input and decision-making. |
| Cloud Bot | You can download the latest setup files with pre-built bots, crafted to perform specific automation tasks efficiently. This provides a reliable virtual assistant to handle repetitive tasks, simplify your processes and reduce manual efforts. |
| Cloud Unattended | Enables you to optimize your automation capabilities further with Cloud Unattended. This section provides the latest setup files with headless automation solution, allowing you to execute tasks in the background without any user intervention. You can automate tasks 24/7 without the need for human supervision, enhancing business efficiency and scalability, maximize productivity and efficiency with Cloud Unattended. |
Why download the latest version?
Better User Experience: With each update, we work diligently to enhance the user interface, making it more intuitive, visually appealing, and easy to navigate.
Improved Functionality: We continuously strive to improve the application's performance and functionality. By downloading the latest setup file, you'll have access to the most recent features and enhancements, allowing you to accomplish tasks more efficiently.
Bug Fixes and Security Patches: Our team regularly addresses reported issues and vulnerabilities. The latest version will include all the necessary bug fixes and security patches, ensuring a smooth and secure experience.
Compatibility: As technology evolves, we adapt to new platforms and operating systems. By keeping your application up-to-date, you ensure it remains compatible with the latest devices and software.
How to download the latest version?
Select the desired product from the menu.
Click on the Download icon next to the latest version available for the product you wish to download.
Follow the on-screen instructions to install the application on your device.
The installation process is straightforward and user-friendly, guiding you through each step seamlessly. If you encounter any issues or have any questions, don't hesitate to reach out to our support team at support@automatr.tech.
NOTE: The older versions might still be available for compatibility purposes, but we strongly recommend using the latest version to take advantage of the best features and optimal performance.